4. CONFIGURATION
Now that you have installed WampServer, you may want to configure it to suit your need. The first step is very important as this will enable you to easily browse through your project websites by just clicking on the folder under Your Projects in the WampServer home page.
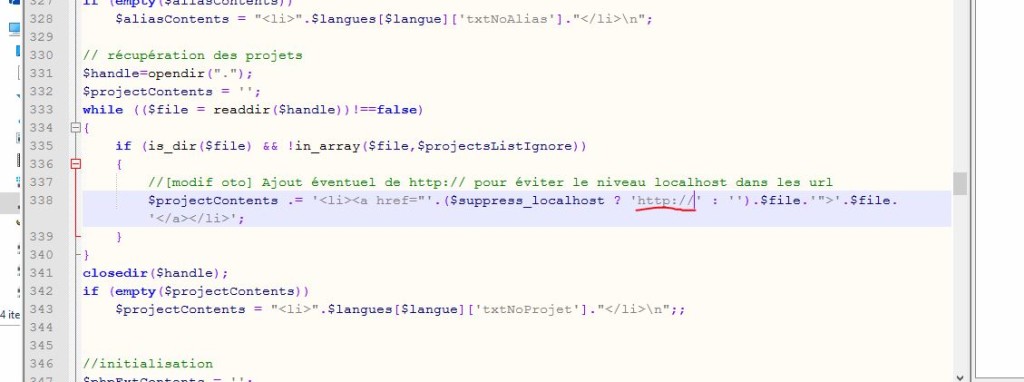
In the www folder “C:\wamp\www ” you should find index.php in this file you will need to make one change to the file.
Open this index.php file in your code editor.
On line 338 change the ‘http://’ to ‘http://localhost/’

Change the ‘http://’ to ‘http://localhost/’

This tiny change will make sure that when you click on a project in the WampServer home page, you will be directed to the right website link thus http://localhost/wordpress instead of http://wordpress
WELL DONE!!.
You have now installed WampServer on your local computer and ready for your web development projects.
In my next tutorial, i will teach you how to configure your Server to enable you access your website projects from all devices including your smart phones, tablets and laptops. Your computer will act as a web server. This will enable you work on your projects from your laptop as well, while you sit in the couch and sip champagne 😀
Leave a comment if something is not clear to you or you want to add something more to this tutorial to help other…


